There are a lot of factors that can determine the success of an enterprise IT migration project. These massive initiatives take a lot of planning, time, and money — and a lot can go wrong. One of the biggest risks is low user adoption. By leveraging Juriba's IT Migration Management Tool, Dashworks, you get out of the box self-service functionality that can involve your end users throughout the entire process, so they perceive the migration as something that is done with them, not to them.
The self-service capabilities enable the users to confirm, deny, or add information about their device and software which often adds a layer of context that is crucial in the migration process. In a previous blog post we discussed the benefits of this capability in more detail, but today we want to focus on how you can set it up in the Dashworks tool itself.
What Is Dashworks Self-Service?
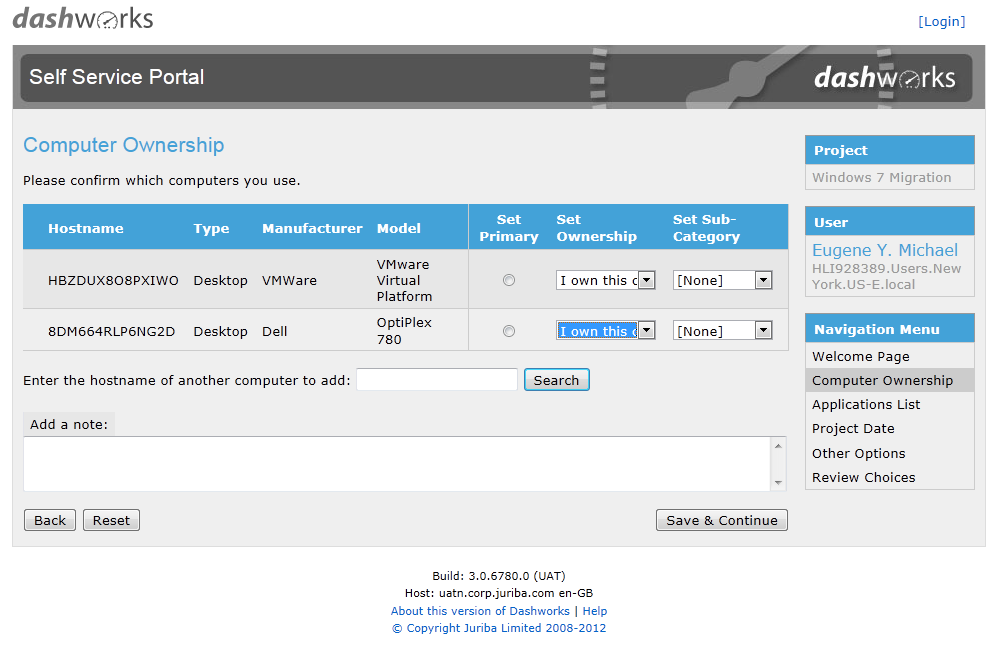
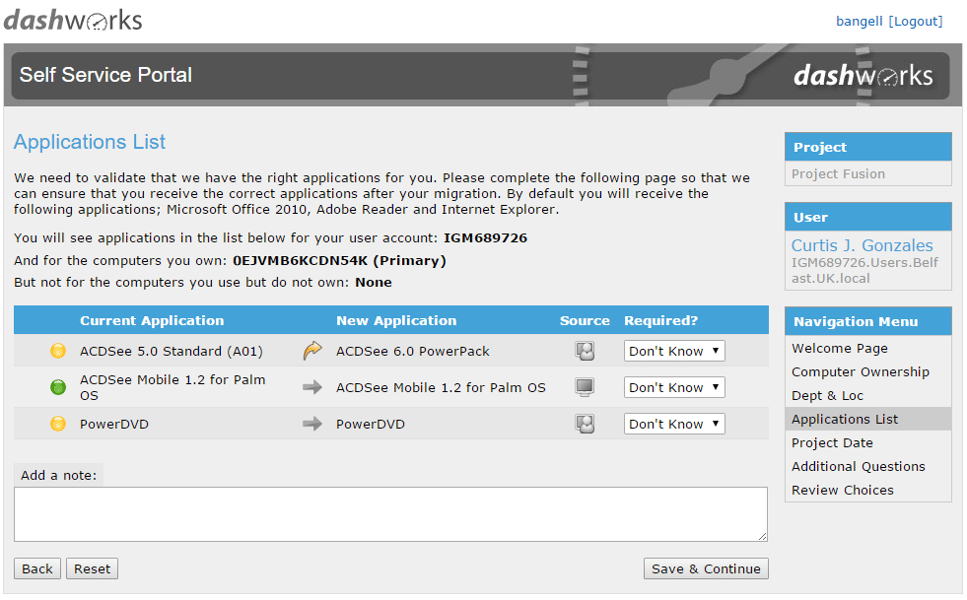
When a user logs onto Dashworks by clicking on a link in an email triggered by the system asking him to self-assess or validate the existing information, he or she will be taken through a set of screens - for example:
 Welcome Page
- Computer Ownership
- Application List
- Project Date
- Other Options
- Review Choices
On the right, you can see the screen for computer ownership.
Here, the user can see the pre-populated data that Dashworks has pulled from various feeds and systems.
If any information has changed or is incorrect, the user can change it, add other computers or notes.
User Permissions For Staff & Management
Depending on how your organization is set up, you might want to give different users different levels of permissions. With Dashworks, you can assign very granular permission levels based on the person's role. You can assign all the non-management users control over their own devices/applications only while the section managers have access to override the users in their section. Subsequently, department managers can have control over the whole department.
Highly Customizable For Each User
Just like you can select the permissions of each user, you can also customize what they can do. For smaller groups or divisions (e.g., teams that work on time-sensitive projects, or for laptop depot scenarios), you can give them the option to choose the date they upgrade. You can also use this tool to cut costs. For example, if a department is a heavy application consumer, you can let them make notes about applications, so management decides on how many licenses are needed.
Keep What You Need, Delete The Rest
When Dashworks makes an inventory of all devices and software, it can also detect the frequency of usage and the last usage date of an application. Based on this information, it can suggest which applications should be deleted — for example if it hasn't been used for several months, or is installed but has never been used. By using self-service and allowing users to update their information or make notes, you can also ensure that applications only used at certain times (e.g. end of year financial apps) do not get removed. This puts control into the hands of the user, and the list can be globally filtered to remove common applications like Office or Internet Explorer, leaving only the business applications for decision.

Dashworks Speaks Your Language
Having multiple languages in the self-service portal gives your users more control and takes pressure off senior management. For example, if your company has a foreign division where only the senior management speaks French, they won't need to act as translator for every employee there.
How to Set up Self Service In Dashworks 4.2
If you are a Dashworks Administrator, you can set up self-service very easily following a couple of steps in your admin dashboard. To get the to the self-service admin area, start from your Dashworks Project Homepage and select Administration > Manage Project and choose the project you are working on from the drop-down box. Then click on Self Service on the top right in the menu to reach the Manage Self Service Portal screen.

Here, you will find a wizard screen that will walk you through several tabs that will correlate with the screens the user will see later when using the self-service:
- Details: Here you can select if you want to enable self-service capabilities on your project. To do so, check the check box. Also, you can choose whether or not you allow anonymous users to use the self-service portal, which mode you would like to use it in (users or computers), set the base URL and upload your logo for a branded experience.
- Welcome Page: The Welcome Page is the first page a user will see once he or she enters the portal. Use this tab to welcome your user, communicate any necessary information and set expectations.
- Computer Ownership / Mailbox Ownership: Dashworks can be utilized for a variety of use cases. If you are getting ready for an email migration, the Mailbox Ownership tab is displayed and allows the user to confirm their mailbox ownership. In a Computer or User scheduled project, the Computer Ownership tab whether the user can verify their computer ownership.
- Department/Location: Often location and department information are needed to schedule a desktop migration. In this tab, the end user can validate or add this information to the computer and user record.
- Project Date: This tab allows the user to update one of the five system dates - Completed Date, Forecast Date, Migrated Date, Scheduled Date and Target Date.
- Options: There are several additional choices in the Other Options tab. The user can either select project tasks so that he or she can update these tasks.
- Review Choices: Here you can choose whether or not your users should be able to examine the choices they have made and confirm them before leaving the wizard.
That's it. Within a few minutes, you can set up your self-service portal and enable your users to be part of the migration project, provide valuable insights and context around their devices and applications, and even create a pull effect for your project as users can raise their hand when they are ready for migration and schedule themselves.
Don't use Dashworks yet? If you are an enterprise planning an IT migration project with more than 5,000 seats, schedule a demo to see all the ways Dashworks can help you better plan, manage and control your next desktop migration project.
Barry is a co-founder of Juriba, where he works as CEO to drive the company strategy. He is an experienced End User Services executive that has helped manage thousands of users, computers, applications and mailboxes to their next IT platform. He has saved millions of dollars for internal departments and customers alike through product, project, process and service delivery efficiency.
Topics:


